
Similar to how Microsoft Publisher gained popularity at least a decade ago, Canva is attracting users seeking control over their company’s brand and visuals, whether it’s for print or online, without having to rely on professional designers. However, while using this DIY approach might seem cost-effective initially, overlooking proper file setup could lead to unexpected expenses down the line.
We have some tips to help you set up your print projects so there’s little to be fixed by your printer, saving you time and money.
While there are many templates to choose from, be sure to choose one that uses the correct measurements: pixels are for online use only, inches for US printers and metric for pretty much everyone else.
Whether you use a template or set up your own project, it’s important to keep images and text you wouldn’t want trimmed off away from the edges of your piece.
Commercial printers don’t print postcards one at a time on paper that’s cut down to the final size you want, they put multiple copies up on a large sheet of paper and then cut a big stack all at once to save paper. Those stacks of paper can shift when they’re being cut so it’s best to keep images, logos and text at least 3/16″ or 0.19″ away from the edge.
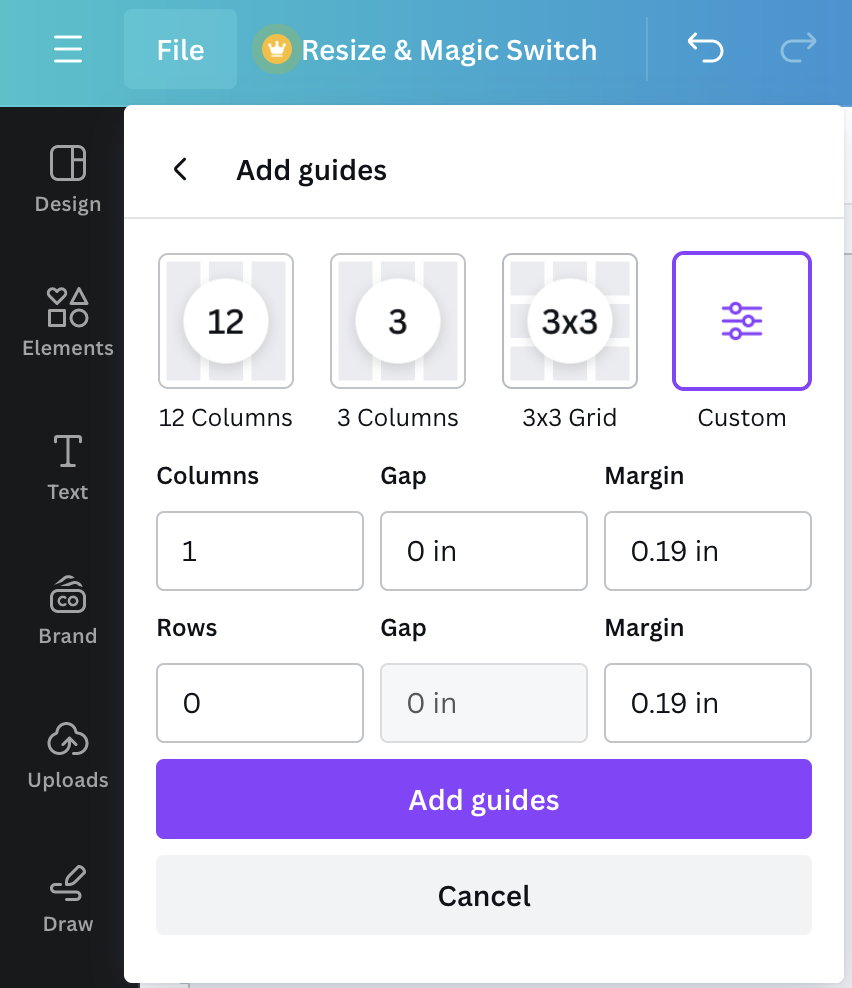
Canva’s standard margin is 0.5 inches from each edge, but you can get much closer to the edge by adding guides. To add basic margins using our suggested measurement, just head to the “File” menu, select “Settings” and then click on “Add guides” from the pop out menu. Once you see the next window, click on “Custom” and match what’s in the image to the right.
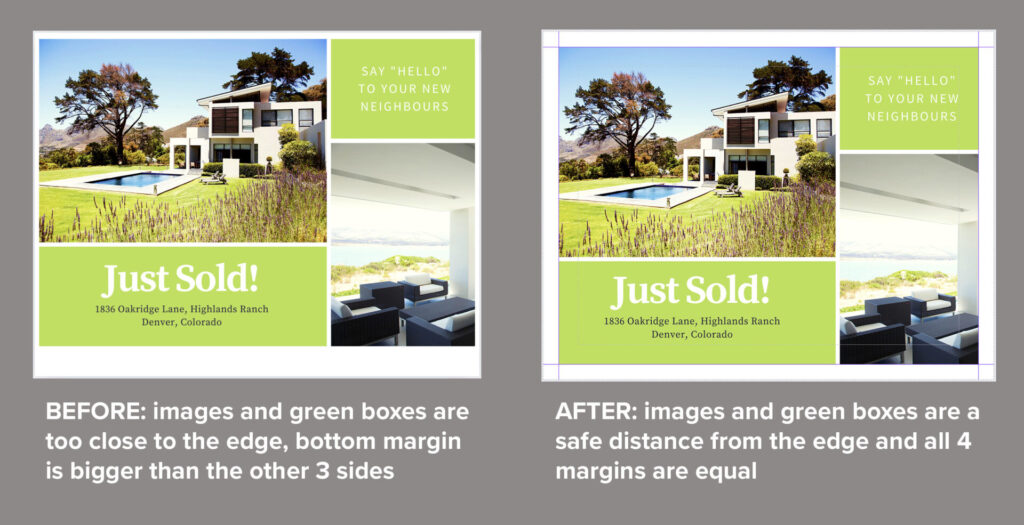
If you want a white border around your final piece and the template you choose has items too close to the edge, or uneven margins like the example below, adding guides ensures you have a set space to fit everything neatly.
If you don’t want a white border around the edge of your finished piece, you’ll need to add bleed. Bleed is the extra design area that extends beyond the final cut line. It ensures no white edges appear after trimming. Luckily, the templates we use in our samples all have the option of bleed, but you might have to extend images and boxes so they spread into the bleed area. The standard amount of bleed is 0.125″ off EACH edge, and will affect images, lines, graphics and color boxes.
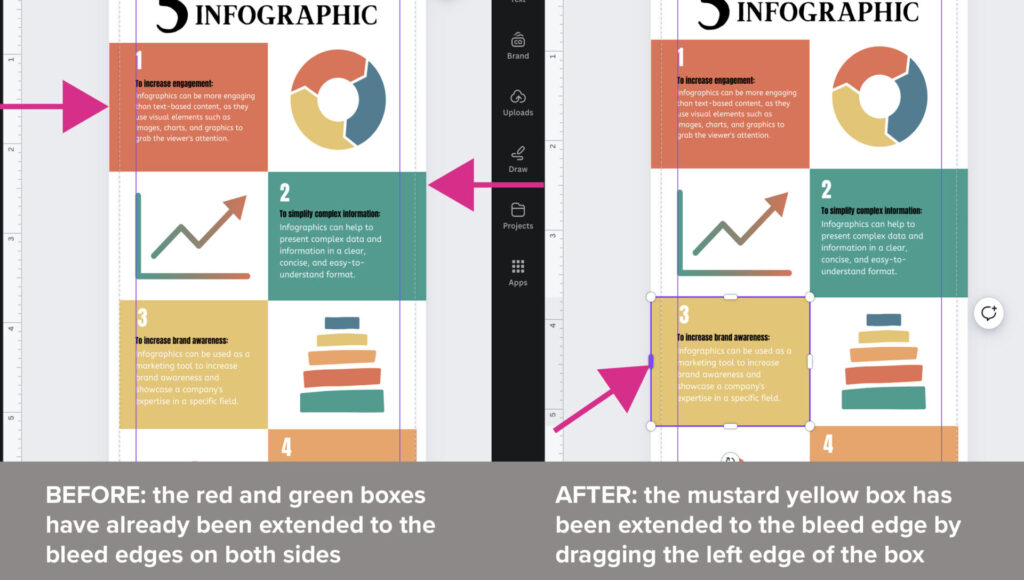
To see how much bleed is in your template, head to the “File” menu again, down to “Settings” and click on “Show print bleed.” Once that’s been checked, any boxes or images that you want to go over the edge of your piece need to be extended into the space shown, as in the example below.
Ensure all uploaded photos and graphics are at least 300 DPI (dots per inch) for crisp printing. Canva’s stock photos are generally high resolution and most smart phones automatically take high resolution pictures.
If the photo or logo you want to use already looks blurry or pixelated, it will translate poorly to print.
Ready to send your job to your printing company? The best option is to share the project with them, not just download a PNG file and send it, even though a PNG is the default option you’ll see when you choose “Download” from the “File” or “Share” menus as shown below. If you still want to just download a file for print, just choose “PDF Print” from the drop down menu. Be sure to check the “Crop marks and bleed” button and change the Color profile to CMYK, though this requires a paid subscription.

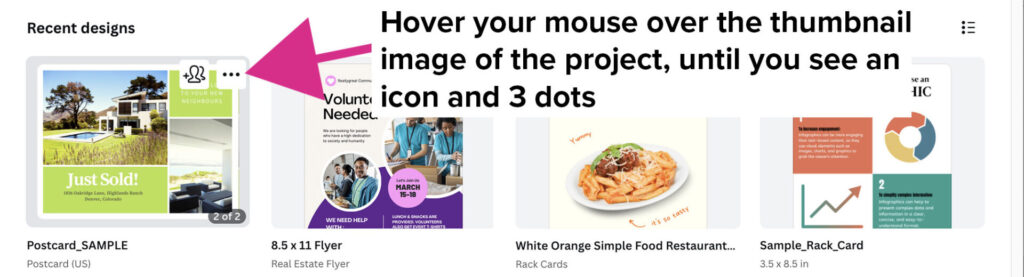
You can also share your project from the home page, in your “Recent designs” section, by clicking on the 3 dots that appear when you hover your cursor over the project thumbnail. Clicking on those 3 dots takes you to the same menu in Step 1.
Canva empowers you to take control of your brand’s visual identity, but achieving a polished print product requires a few extra steps. By following these simple tips – choosing the right template measurements, setting margins and bleed, and ensuring high-resolution images – you’ll create print-ready designs that impress without surprises at the printer. So unleash your creativity and conquer print with confidence!
All images are for reference purposes only and reflect available settings and menus of the ONLINE version of Canva at time of publication.